Peel and Stick Cabinet Wrap: Cover Ugly Rental Cupboards
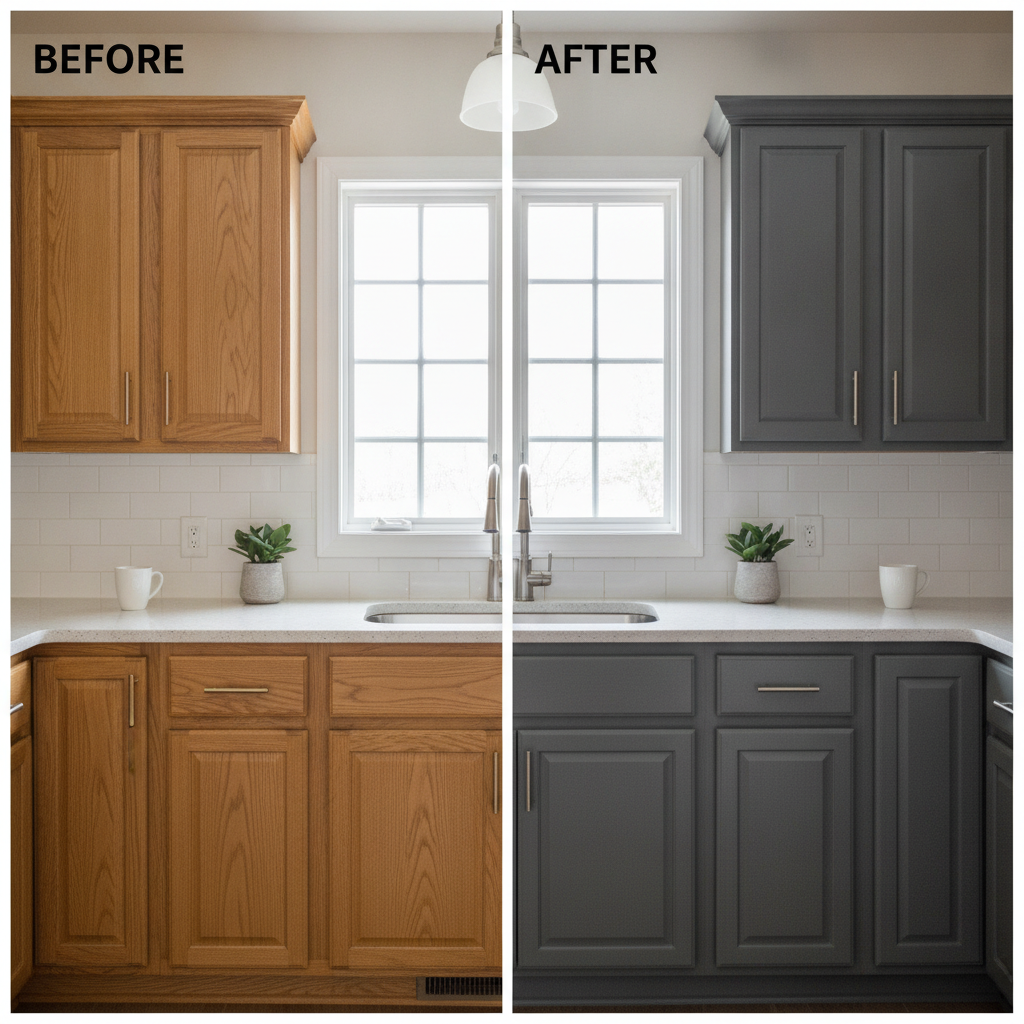
Tired of those dated, builder-grade honey oak cabinets in your rental kitchen? You’re not alone! Transforming your kitchen doesn’t require permanent changes or landlord approval when you use a clever solution like peel and stick cabinet wrap. This renter-friendly hack offers an instant, high-impact upgrade, giving your kitchen a fresh, modern matte makeover without breaking the bank or your lease.
Imagine sleek, contemporary cabinets that reflect your personal style, all achieved with a removable vinyl film. This guide will walk you through everything you need to know to apply peel and stick cabinet wrap cleanly and effectively, ensuring a stunning result that’s easy to reverse when it’s time to move.
Architectural Vinyl Wrap vs. Basic Craft Paper
When considering a peel and stick cabinet wrap project, understanding the material is key. Forget flimsy contact paper—we’re talking about high-quality architectural vinyl wrap. This material is designed for durability, ease of application, and a sophisticated finish, often mimicking real wood, matte, or even textured surfaces.
Architectural vinyl is thicker, more forgiving, and typically features air-release channels to prevent bubbles. It’s a far cry from the basic craft paper you might have used in school. This professional-grade film ensures your cabinet makeover looks polished and lasts as long as you need it to.
Deep Cleaning and Degreasing Cabinet Surfaces
Before you even think about applying your peel and stick cabinet wrap, proper preparation is paramount. Grease and grime are the enemies of adhesion, especially in a kitchen environment. Start by thoroughly deep cleaning and degreasing all cabinet surfaces. A strong cleaner, like a TSP substitute, works wonders to cut through years of buildup.
- Mix your cleaner according to package directions.
- Wipe down all cabinet doors, drawer fronts, and cabinet boxes.
- Pay extra attention to areas around handles and cooking zones.
- Rinse thoroughly with clean water to remove any residue.
- Allow surfaces to dry completely before proceeding.
A clean surface ensures your vinyl wrap adheres properly, preventing frustrating bubbles or peeling later on.
Removing Cabinet Doors & Hardware for Flat Table Wrapping
For the most professional finish, we highly recommend removing your cabinet doors and drawer fronts. This allows you to work on a flat surface, making the application of your peel and stick cabinet wrap significantly easier and more precise. Don’t forget to remove all existing hardware, too!
Label each door and its corresponding hinges as you remove them to simplify reassembly. Lay your doors flat on a clean, protected workspace, like a large table covered with a moving blanket or old sheets. This setup provides the best control for a flawless application, much like when you’re applying contact paper to countertops.
Using Heat Guns on Beveled Edges and Recessed Shaker Panels
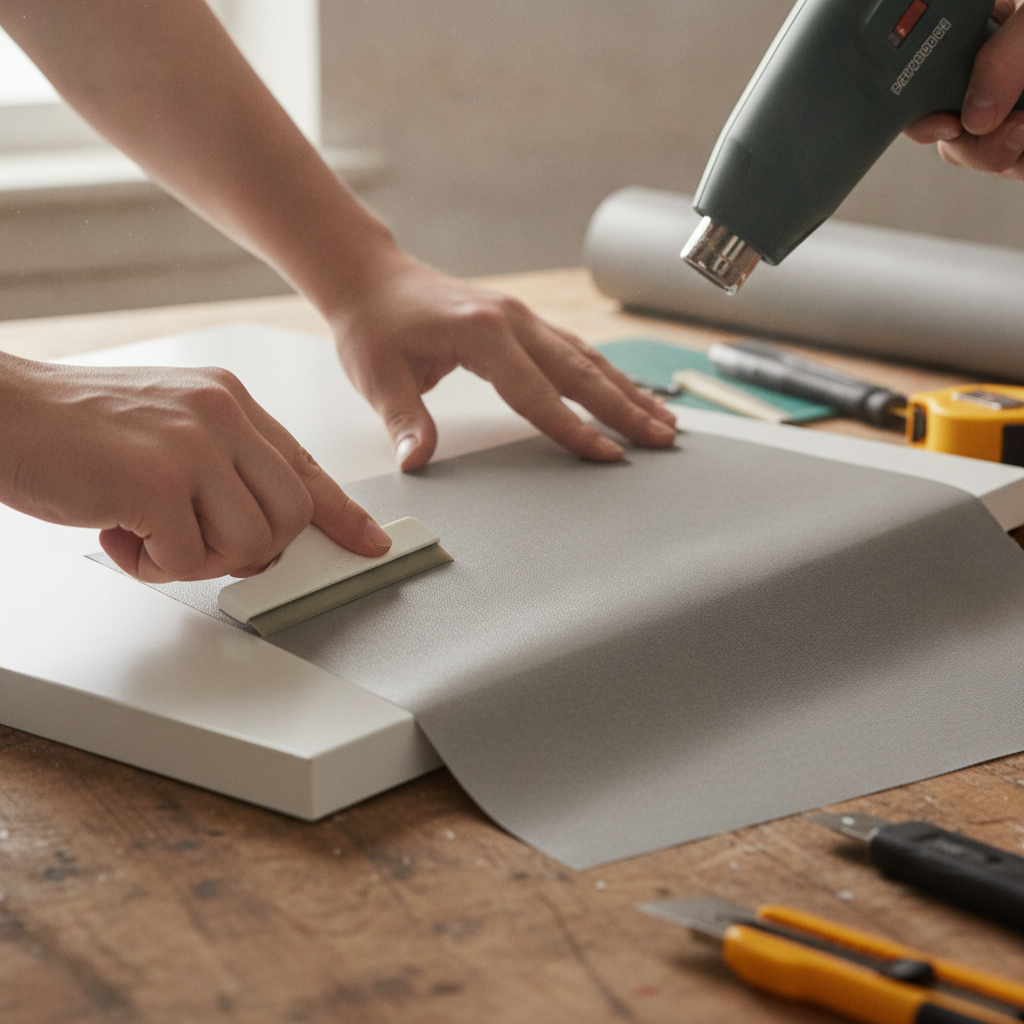
Working with architectural vinyl wrap on intricate cabinet designs, such as shaker style doors with recessed panels or beveled edges, requires a specific technique: heat. A low-setting heat gun is your best friend here. It makes the vinyl pliable, allowing it to conform smoothly around curves and into recesses without creasing or tearing.
Apply gentle heat while stretching and smoothing the vinyl with a felt-edged squeegee. This helps activate the adhesive for a stronger bond and eliminates air bubbles. Take your time, working in small sections, and remember that patience is key for a seamless finish on these trickier areas. For more renter-friendly kitchen upgrades, consider pairing your new cabinets with a peel and stick backsplash.
Reassembly and Landlord Damage-Free Move-Out Guarantee
Once all your cabinet doors and drawer fronts are beautifully wrapped, it’s time for reassembly. Carefully reattach the hardware you removed—perhaps even consider upgrading your cabinet hardware for a fresh look! Then, hang your newly transformed doors back on their corresponding cabinet frames. Stand back and admire your handiwork; your kitchen will feel brand new!
The beauty of peel and stick cabinet wrap is its temporary nature. When your lease is up, the vinyl can be carefully peeled away, leaving no sticky residue or damage to the original cabinet surfaces. For further inspiration on reversible home transformations, proving that high style doesn’t have to be permanent. Pairing this with wireless under cabinet lighting can truly complete your rental kitchen’s glow-up.
Conclusion
Giving your rental kitchen a high-end makeover with peel and stick cabinet wrap is an incredibly satisfying and smart DIY project. It’s a testament to how temporary solutions can create lasting impressions, allowing you to personalize your space without risking your security deposit.
With careful preparation, the right tools, and a bit of patience, you can transform those ugly rental cupboards into a kitchen you’ll love to live in. Enjoy your stunning, landlord-approved kitchen transformation!