DIY Pinch Pleat Curtains: Turn Budget Drapes into Custom Luxury
Dreaming of custom drapery without the custom price tag? You’re in the right place! Learning how to make DIY pinch pleat curtains can transform ordinary, budget-friendly flat panels into sophisticated, tailored window treatments that exude luxury. This method allows you to achieve that high-end designer look for a fraction of the cost.
Pinch pleats offer a timeless elegance, providing structure and beautiful, uniform folds that elevate any room. With a few simple tools and our clear instructions, you will discover just how easy it is to create stunning diy pinch pleat curtains yourself. Get ready to impress with your newly acquired design skills!
Standard Pocket Curtains vs. Custom Tailored Pinch Pleats
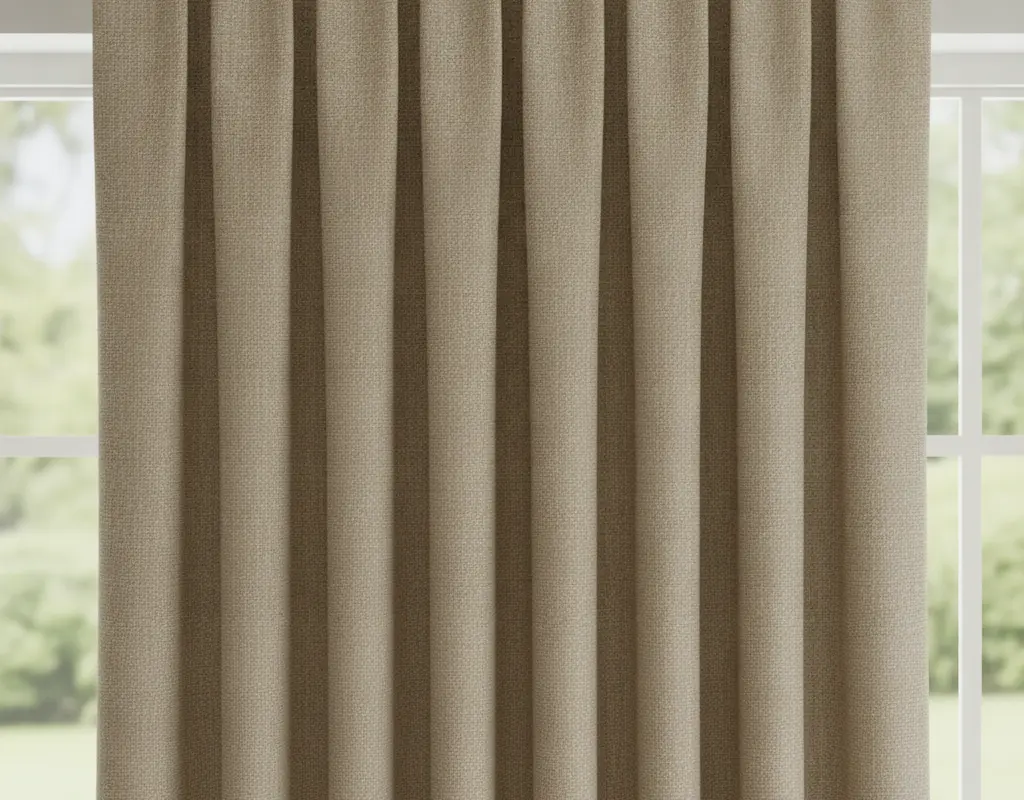
Many ready-made curtains come with a rod pocket or grommet top, offering a casual, relaxed aesthetic. While functional, they often lack the crisp, architectural lines that truly elevate a space. Pinch pleats, conversely, provide a structured, formal appearance.
These tailored pleats are sewn in at the top, creating elegant, deep folds that flow gracefully to the floor. This style not only looks more refined but also helps the curtains stack back neatly when open, maximizing light and views. Understanding different curtain headings can help you appreciate the unique appeal of this classic style. For more on curtain styles, explore resources like Blinds 2go’s guide on various curtain headings.
Tools: Pleater Tape, 4-Prong Hooks, Iron-On Hemming Tape
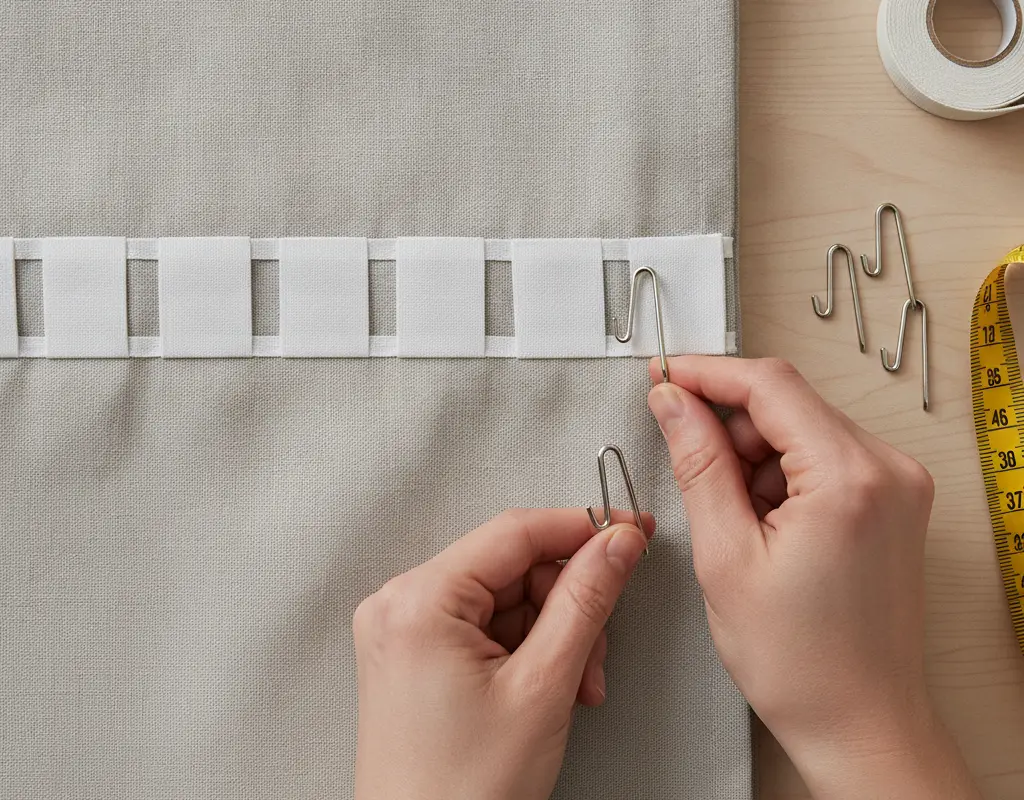
Before diving into the project, gather your essential supplies. You will need your chosen flat curtain panels – consider fabrics like linen blends or cotton for their beautiful drape. Next, acquire pleater tape, which is a specialized tape with woven pockets designed for pleat hooks. You will also need 4-prong pleater hooks, which are crucial for forming the pleats.
For a no-sew option, iron-on hemming tape is a game-changer. Otherwise, a sewing machine, thread, scissors, and an iron are standard. Also, ensure you have a measuring tape or ruler for precise placement. Choosing the right fabric is also key for the best results; ensuring your DIY project looks professional.
Step-by-Step: Sewing or Ironing Pleater Tape to Flat Panels
First, lay your flat curtain panel face down on a clean, large surface. If your panels are too long, hem them to your desired length first. Then, measure and cut your pleater tape to the width of your curtain panel, minus any side hems you wish to maintain.
- Sewing Method: Pin the pleater tape along the top edge of the back of your curtain panel. Ensure the pockets face downwards towards the bottom hem. Stitch securely along both the top and bottom edges of the tape, close to the edge, to create a strong attachment.
- Iron-On Method: For a no-sew approach, position the iron-on hemming tape between the pleater tape and the curtain panel. Follow the manufacturer’s instructions for your hemming tape, typically involving pressing with a hot iron to create a strong, permanent bond.
Always double-check that the pleater tape is straight and evenly applied across the entire width of the curtain.
Hook Insertion Formulas for Double and Triple Pleats
This is where the magic of diy pinch pleat curtains truly comes to life. The number of prongs you use on your hook and the pockets you skip determine the pleat style. For a standard double pleat, insert the two outer prongs of your 4-prong hook into the pleater tape pockets, skipping one pocket in between them. This creates a neat, two-fold pleat.
For a more luxurious triple pleat, insert three prongs, skipping pockets to create a fuller, three-fold pleat. Experiment with spacing the pleats evenly across the panel. A good rule of thumb is to measure the total width of your curtain panel, divide by the number of desired pleats, and mark where each pleat should start. This ensures uniform spacing and a professional finish.
Steaming & Memory Training Curtains for Crisp Designer Folds
Once your hooks are inserted and your curtains are hung, the final step is crucial for achieving that custom, designer look: memory training. Use a garment steamer to gently steam the entire length of each pleat. As you steam, carefully gather the fabric into neat, uniform folds, encouraging them to fall straight.
You can use soft ties or even paper clips to temporarily hold the pleats together for a few days, allowing the fabric to “remember” its new shape. This process sets the pleats, ensuring your diy pinch pleat curtains maintain their crisp, elegant appearance over time.
Conclusion
Transforming basic curtain panels into elegant DIY pinch pleat curtains is a rewarding project that significantly upgrades your home’s aesthetic. By following these steps, you can achieve a custom, high-end look without the exorbitant cost of bespoke drapery. The structured beauty of pinch pleats adds a touch of timeless sophistication to any room, enhancing both style and functionality.
Embrace the satisfaction of creating something beautiful with your own hands. Your new pinch pleat curtains will not only look stunning but also reflect your personal style and attention to detail. Enjoy the luxurious ambiance they bring to your living space!