DIY Preserved Moss Bowl: Zero-Maintenance Table Greenery
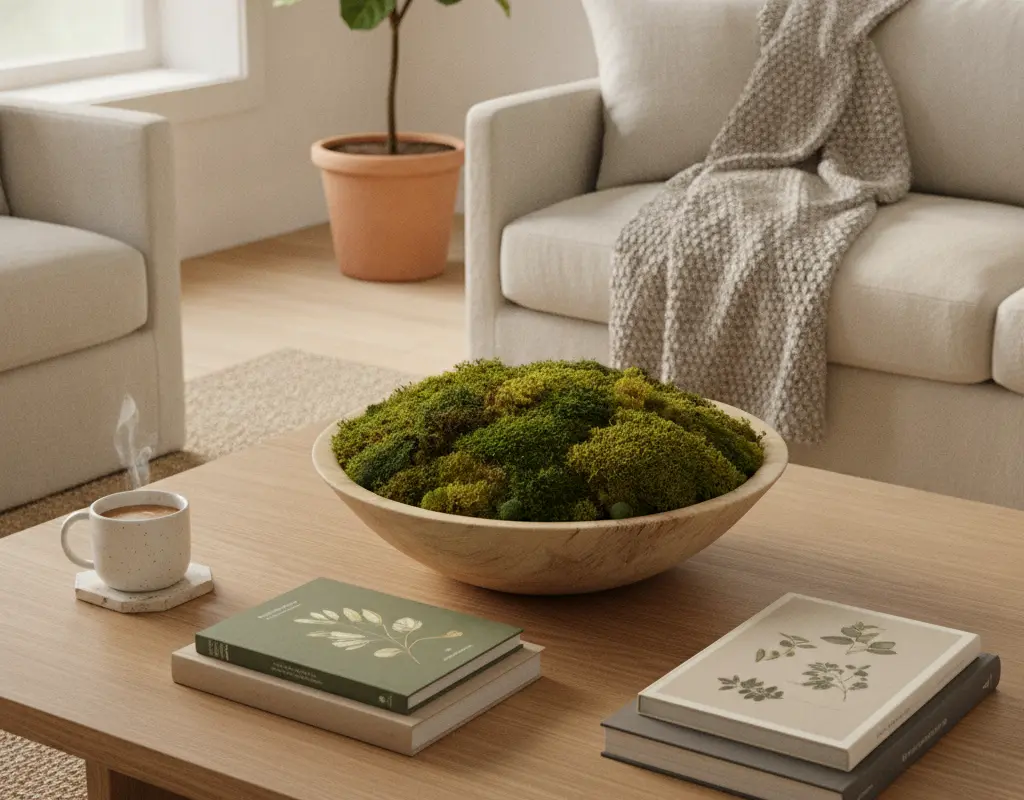
Transform your living space with lush, vibrant greenery that requires absolutely no watering or sunlight. A DIY preserved moss bowl is the ultimate zero-maintenance decor piece, offering rich, organic texture and a touch of botanical modern aesthetic to any table or shelf. This simple project brings the beauty of nature indoors without the upkeep of live plants, making it perfect for busy individuals or those lacking a green thumb.
Crafting your own preserved moss bowl is not only incredibly easy but also allows for immense creative freedom. You can select unique vessels, combine various moss types, and create a custom arrangement that perfectly complements your home decor. Get ready to add a sophisticated, natural element that stays evergreen, year after year.
The Botanical Modern Aesthetic: Preserved vs. Live Moss
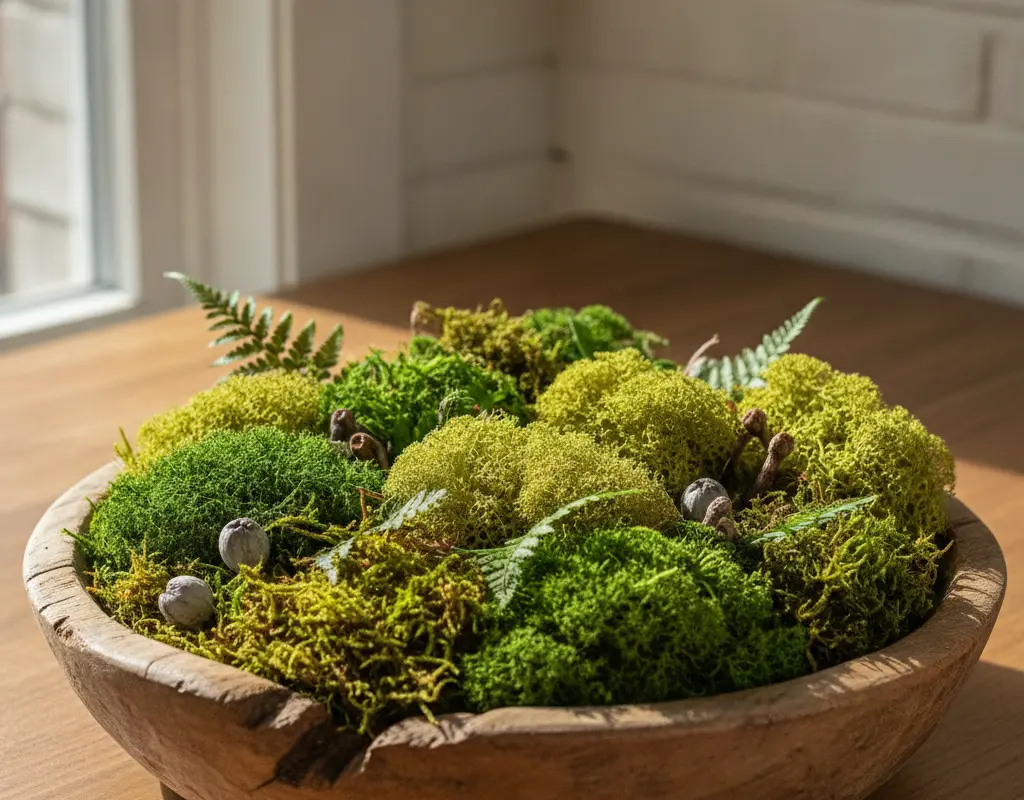
The allure of the botanical modern aesthetic lies in its seamless blend of natural elements with contemporary design. Preserved moss bowls fit this style perfectly, providing a pop of natural green without the demands of live plants. Unlike live moss, which needs specific light, humidity, and regular misting to thrive, preserved moss is real moss that has undergone a preservation process, often involving glycerin and dyes, to maintain its soft texture and vibrant color indefinitely.
This means no watering, no pruning, and no worrying about sunlight exposure. It’s an ideal solution for adding organic texture to dimly lit spaces or for homeowners who travel frequently. For more inspiration on bringing natural elements into your home, consider exploring how to style high-end minimalist faux branches.
Sourcing Antique Wooden Dough Bowls and Travertine Dishes
The foundation of a stunning DIY preserved moss bowl lies in its vessel. Antique wooden dough bowls offer a rustic, artisanal charm, each piece telling its own story. Their weathered patina and unique shapes add immediate character and warmth. For a more contemporary, minimalist look, consider shallow travertine dishes.
Travertine, with its porous texture and earthy tones, provides a sophisticated, organic modern base. You can often find these unique vessels at antique markets, online marketplaces, or specialty home decor stores. Remember, the vessel sets the tone for your entire moss arrangement, so choose one that speaks to your personal style.
Filling Bases with Floral Foam to Build Elevation Crowns
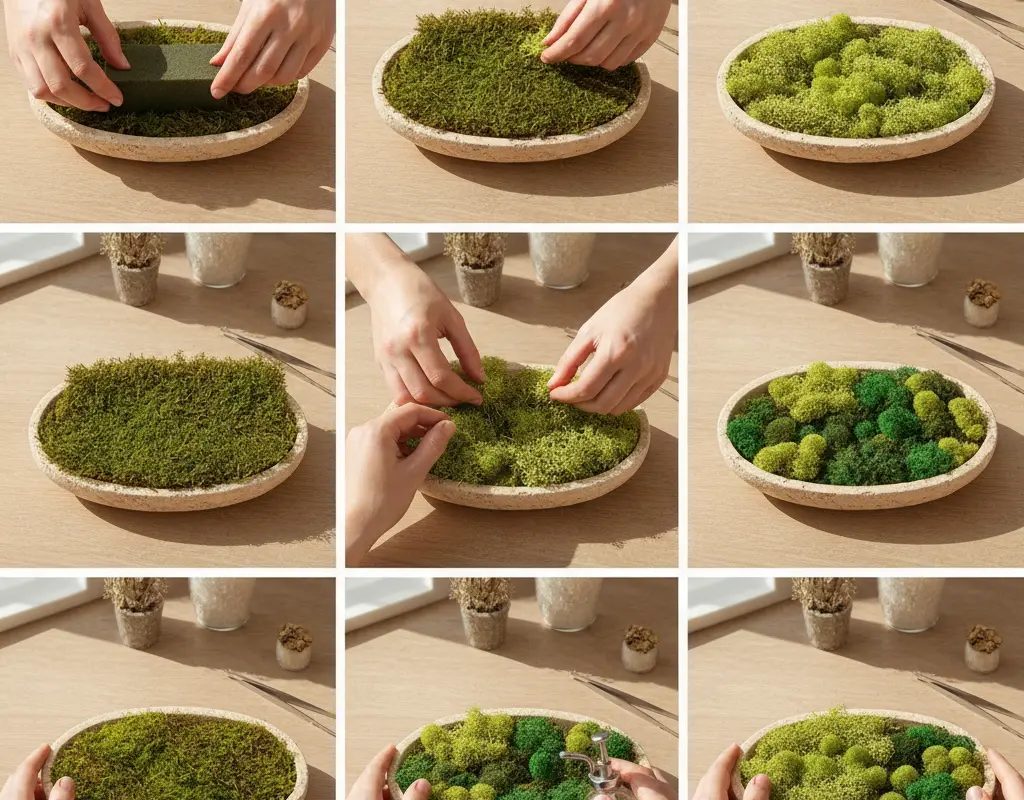
Once you have your chosen vessel, the next step is to create a sturdy, elevated base for your moss. Floral foam, easily found at craft stores, is ideal for this. Cut the foam to fit snugly within your bowl or dish, ensuring it sits just below the rim. This creates a stable foundation and allows you to build varied heights and contours.
You want to create an “elevation crown” – a slight dome in the center – to give your moss bowl a natural, mounded appearance. Secure the foam with hot glue if needed, especially in shallower dishes. This structural element is crucial for achieving a professional, sculptural look. This technique is similar to building height in other decorative displays, much like creating organic stone pottery.
Layering Reindeer, Sheet, and Mood Moss for Textural Contrast
The magic of a truly captivating moss bowl comes from layering different types of preserved moss. Start with a base layer of sheet moss, which provides a flat, earthy foundation. Then, introduce reindeer moss, known for its airy, sponge-like texture, to build volume and softer edges. Finally, accent with mood moss, which offers a more clumpy, forest-floor feel, creating beautiful textural contrast and depth.
Use a small amount of hot glue or floral adhesive to attach the moss to the foam base, working in small sections. Don’t be afraid to mix and match, allowing the different textures to intertwine naturally. This artistic layering is key to achieving that high-end, designer look, much like how interior designers meticulously style a coffee table vignette. For further guidance on creating beautiful moss centerpieces, sources like Better Homes & Gardens often provide helpful DIY tutorials.
Long-Term Care: Keeping Preserved Moss Out of Direct Sunlight
While preserved moss requires no watering, it does benefit from a few simple care guidelines to ensure its longevity. The most important rule is to keep your DIY preserved moss bowl out of direct sunlight. Prolonged exposure to harsh UV rays can cause the moss to fade and become brittle over time. Place your bowl in a shaded corner, on a bookshelf, or as a centerpiece where it receives indirect light.
Additionally, avoid placing it in areas of high humidity, such as bathrooms, as this can sometimes reactivate the moss and encourage mold. A gentle dusting with a soft brush or a light blast of cool air from a hairdryer on a low setting is all that’s needed to keep it looking fresh. Embracing this style is a perfect example of what defines organic modern decor.
Conclusion
Creating a DIY preserved moss bowl is an effortless way to infuse your home with natural beauty and a sophisticated, organic touch. This project offers all the aesthetic benefits of living plants without any of the demanding upkeep, making it a perfect addition to any modern interior. From selecting your unique vessel to artfully layering various moss textures, each step allows for personal expression.
Enjoy the lasting greenery and tranquil vibe your new zero-maintenance table decor brings. It’s a testament to how simple, thoughtful DIY projects can make a significant impact on your home’s ambiance and style, providing a serene focal point for years to come.