Reeded Glass Window Film: Fluted Luxury Privacy DIY
Transforming your rental space often means finding creative, damage-free upgrades. One of the most elegant and effective solutions for privacy and style is applying reeded glass window film. This innovative DIY project instantly elevates plain windows, giving them the sophisticated look of fluted glass without the hefty cost or permanent installation.
Imagine beautiful, diffused light filtering into your home while maintaining complete privacy. This guide will walk you through the simple steps to achieve this high-end aesthetic, ensuring a flawless application and easy removal when it’s time to move out.
The Rise of Fluted Glass in Modern Luxury Architecture
Fluted glass, also known as reeded glass, has surged in popularity within contemporary interior design. Its distinctive vertical ridges offer a unique blend of visual texture and practical benefits, making it a favorite for high-end spaces seeking both light and seclusion. While custom fluted glass panels are costly and permanent, reeded glass window film provides an accessible, renter-friendly alternative that captures the same luxurious vibe.
This aesthetic extends beyond windows, appearing in cabinetry, room dividers, and shower screens. The beauty lies in its ability to diffuse light softly, creating an ethereal glow while obscuring direct views. It’s a smart way to introduce architectural interest without committing to major renovations, perfect for apartment living where flexibility is key.
Static Cling vs. Light Adhesive Film Comparison
When selecting your reeded glass window film, you’ll encounter two main types: static cling and light adhesive. Static cling films are ideal for renters as they use no glue, adhering purely through static electricity. This makes them incredibly easy to install, reposition, and remove without leaving any residue, and they can even be stored and reused.
Light adhesive films offer a slightly more permanent bond but are still designed for easy removal, often with heat or specific solutions. For most rental applications, especially if you anticipate moving, static cling is the superior choice for its damage-free promise. Consider the duration of your stay and your desire for reusability before making a selection.
Prepping the Glass: Lint-Free Scraping and Soapy Water Spray
Achieving a flawless finish with your reeded glass window film starts with meticulous preparation. First, thoroughly clean your window with glass cleaner and a lint-free cloth. Next, use a razor scraper to remove any stubborn paint splatters, tape residue, or unseen grime. This step is crucial for preventing bubbles and ensuring smooth adhesion.
After scraping, give the window another wipe-down. Prepare a spray bottle with a solution of water and a few drops of dish soap. This soapy water is your secret weapon, allowing you to slide and adjust the film easily during installation. Don’t be shy with the spray – a generously wet surface is essential for a bubble-free application, much like preparing for other peel-and-stick projects such as renter friendly wallpaper.
Aligning Vertical Ribs with Laser Levels & Squeegee Squeegeeing
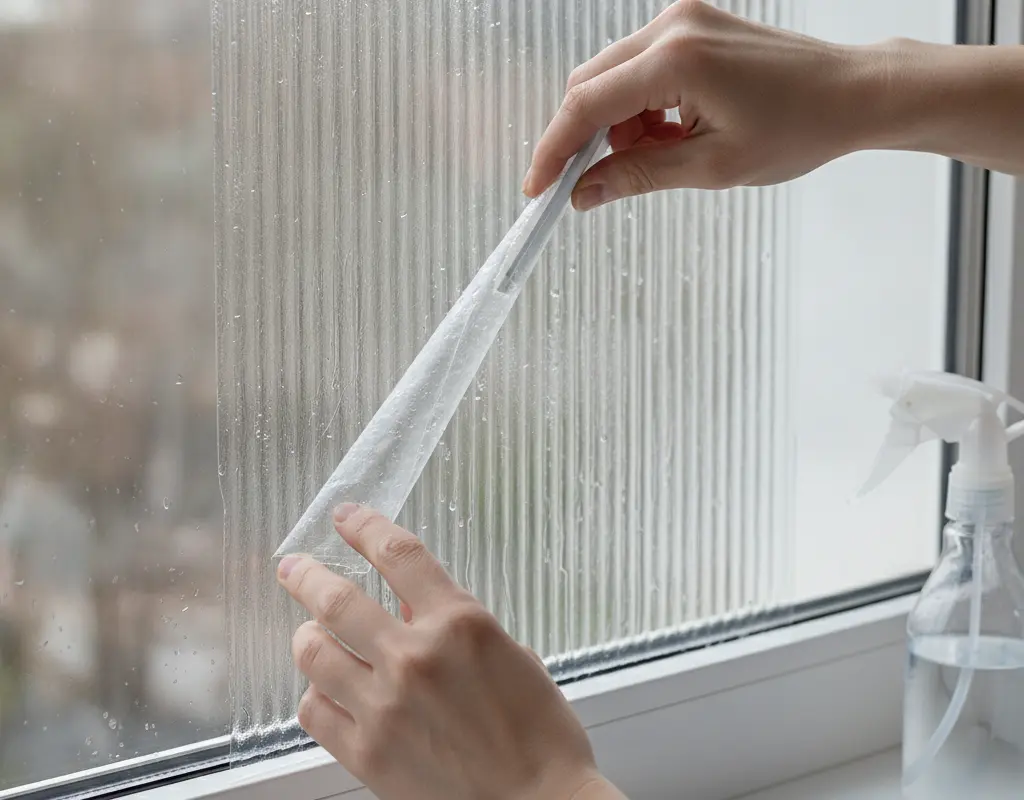
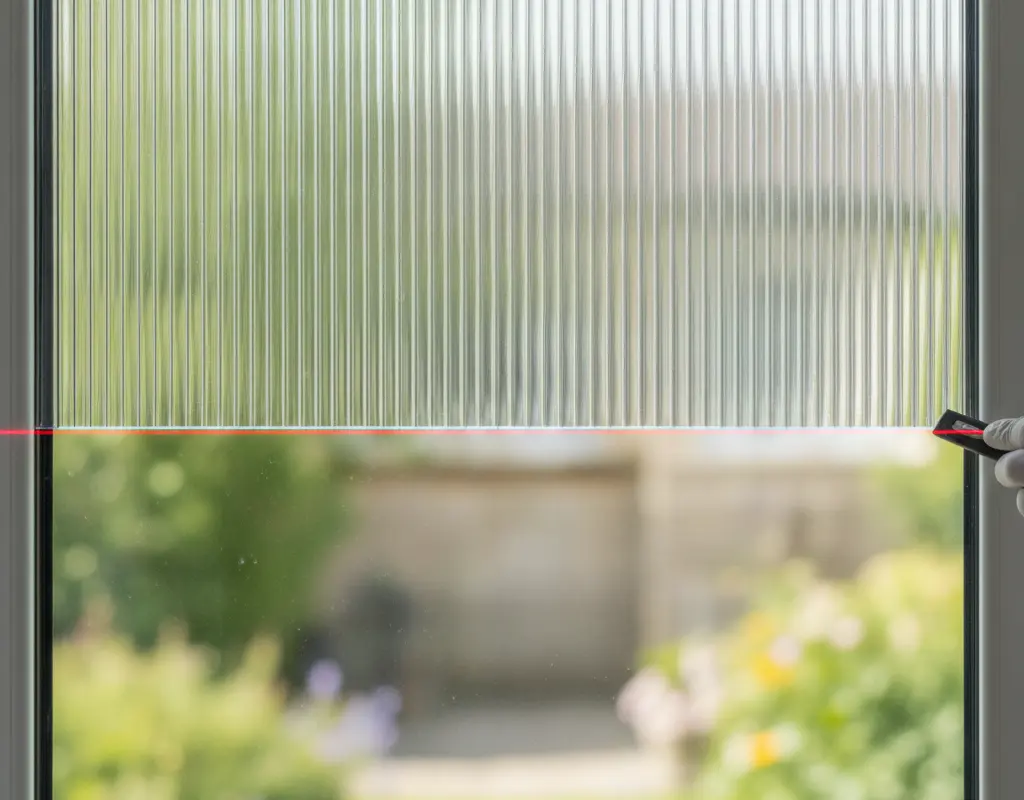
Precision is paramount when applying reeded glass window film to ensure those elegant vertical ribs are perfectly straight. Begin by peeling back a small section of the film’s liner and applying it to the top corner of your wet window. A laser level can be an invaluable tool here, projecting a straight line to guide your initial placement and keep the pattern consistent.
Slowly peel the backing away while continuously spraying both the film’s adhesive side and the window with soapy water. Use a squeegee, starting from the center and working outwards, to smooth out any water and air bubbles. Overlapping strokes ensure all moisture is pushed to the edges. For detailed guidance on this process, experts at The Spruce recommend a methodical approach to window film installation to prevent imperfections.
Trim any excess film using a sharp utility knife and a straight edge for crisp, clean lines. Remember, patience is key for a professional-looking result. This DIY upgrade offers a sophisticated privacy solution, complementing other renter-friendly window treatments like no drill curtain rods or even creative ways to hide vertical blinds without removal.
Move-Out Peeling: Reusable Static Films Stored on Backer Sheets
The beauty of static cling reeded glass window film lies in its impermanence. When it’s time to move, removal is a breeze – simply peel the film away from the glass. There’s no sticky residue to clean, making it an ideal choice for rental properties.
To reuse your film in your next home or store it for later, carefully reattach it to its original clear backing sheet. Roll it up loosely or lay it flat for storage. This reusability makes reeded glass window film a sustainable and economical design choice for temporary living, offering a luxurious touch that can move with you, much like investing in DIY pinch pleat curtains for custom luxury.
Conclusion
Installing reeded glass window film is a brilliant way to infuse your rental with high-end style and much-needed privacy. This DIY project is not only cost-effective but also completely reversible, making it the ultimate renter-friendly upgrade. From meticulous cleaning to precise application, each step contributes to a stunning, professional-looking result that transforms your living space.
Embrace the elegance of fluted glass and enjoy the soft, diffused light it brings into your home. With this simple yet impactful modification, you can create a sanctuary that feels both luxurious and uniquely yours, all without compromising your lease agreement.