

Textured Vase DIY Hack: Organic Stone Pottery
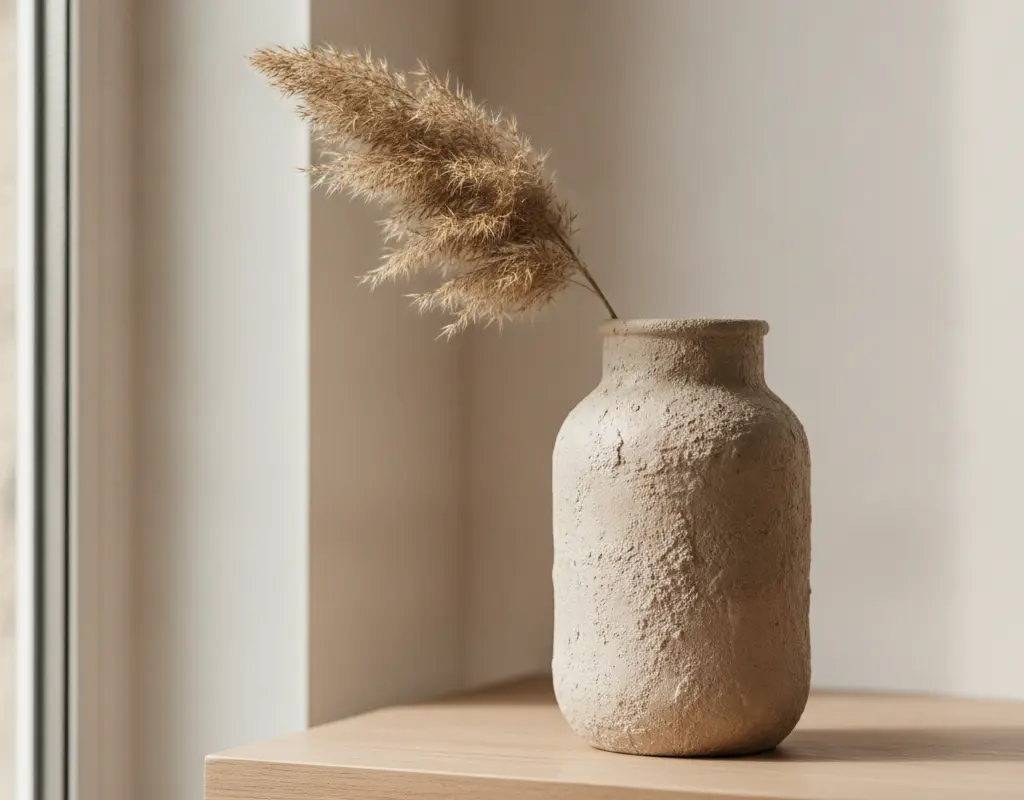
Tired of plain glass jars cluttering your pantry? Imagine transforming those everyday items into stunning, high-end decor. This ingenious textured vase DIY hack lets you create organic stone pottery without breaking the bank.
It’s an easy, budget-friendly project that delivers a sophisticated, artisanal look. Get ready to elevate your home decor with custom pieces that exude natural elegance.
Sourcing Base Shapes: From Pickle Jars to Cheap Thrift Glass
The beauty of this project starts with finding the perfect canvas. Look around your kitchen for empty pasta sauce jars, pickle jars, or even old wine bottles. Their varied shapes offer a fantastic foundation for your new creations.
Thrift stores are also treasure troves for unique glass vessels at unbeatable prices. Seek out interesting silhouettes that will truly shine once textured. Don’t worry about minor imperfections; the textured finish will cover them beautifully.
Mixing Joint Compound with Sand and Matte Acrylic Paint
The secret to that authentic stone look lies in your custom texture mixture. You’ll combine lightweight joint compound with fine-grain sand for grit, and a touch of matte acrylic paint for color. Start with a neutral tone like cream, beige, or a soft gray.
Mix these components thoroughly in a bowl until you achieve a thick, spreadable consistency. This concoction is your key to replicating the organic feel of natural stone or terracotta. For another fantastic way to achieve a similar effect, explore the Baking Soda Paint Hack: Luxury Faux Terracotta Decor for other pottery projects.
Dab-and-Stipple Sponge Texturing Techniques
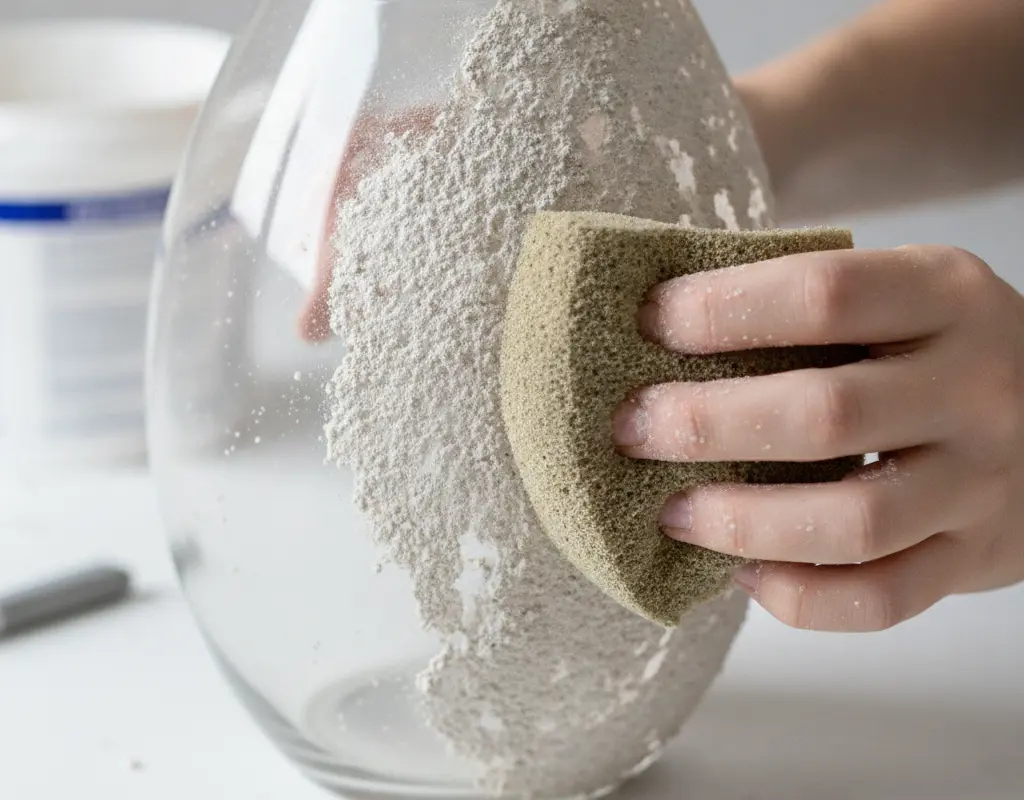
Now for the fun part: applying your custom texture! Use a natural sea sponge or a regular kitchen sponge cut into an irregular shape for the best results. Dip your sponge into the mixture and begin dabbing and stippling it onto your glass base.
Focus on building up layers with an uneven hand, rotating the vase as you go. This technique is crucial for achieving that authentic, organic textured finish. Don’t strive for perfection; embrace the irregularities that give natural stone its charm.
Antiquing with Dark Wax and Ground Coffee for Patina
To deepen the character and create an aged patina, antiquing is a game-changer. Once your textured vase is completely dry, apply a thin layer of dark antiquing wax. Work it into the crevices and wipe away any excess.
For an extra touch of rustic charm, lightly dust some ground coffee onto the still-wet wax. This creates a subtle, earthy staining that mimics centuries-old pottery. The result is a piece that looks like it’s been unearthed from an ancient artisan’s studio.
Sealing Interiors with Waterproof Lacquer for Fresh Florals
While the exterior of your new textured vase is ready to impress, don’t forget the interior. If you plan to use your beautiful creations for fresh flowers, a waterproof seal is essential. Apply a clear, waterproof lacquer or sealant to the inside of the vase.
This step protects your joint compound finish from moisture and ensures your vases are functional as well as beautiful. Once sealed, your Organic Modern style vases are ready to hold fresh blooms or stand alone as sculptural pieces. If you’re looking for other ways to add a high-end, organic touch to your home, consider a DIY Roman Clay Table project.
Conclusion
This textured vase DIY hack proves that high-end decor doesn’t require a high-end budget. With a few simple materials and a creative spirit, you can transform ordinary items into extraordinary pieces of art. Each vase you create will be unique, adding a personalized touch to your living space.
So gather your jars, mix your compound, and start dabbing your way to beautiful, organic stone pottery. These stunning vessels make fantastic gifts or perfect additions to your own home styling, perhaps even as a focal point when you style your coffee table like an interior designer.


